編輯:關於Android編程
快速搭建Android jUnit測試環境
測試的分類: 源代碼透明度 : 黑盒測試:不知道源代碼,關系用戶操作。 白盒測試:根據源代碼編寫測試用例。測試粒度: 方法測試:function test 單元測試:jUnit test 集成測試:intergration test測試次數: 冒煙測試:smoke test(Android monkey) 壓力測試:pressure test Android monkey: Android monkey是Android中用來進行smoke測試的一個工具,模擬一只猴子在胡亂點擊Android手機,使用方法: cmd--> adb shell -->monkey [次數] 【前提是配置了../sdk/platform-tools/的環境變量】public class TestArithmeticService extends AndroidTestCase {
/**
* 將add方法測試代碼,需要將異常拋出去
*
* @throws Exception
*/
public void testAdd() throws Exception {
ArithmeticService service = new ArithmeticService();
int retsult = service.add(5, 15);
assertEquals(22, retsult);
}
}
2.配置AndroidManifest.xml文件
AndroidManifest.xml文件:
< manifest xmlns:android ="http://schemas.android.com/apk/res/android"
package ="com.meritit.dm.junittest"
android:versionCode ="1"
android:versionName ="1.0" >
另外:可以創建Android Test Project,以上配置會自動生成。
 Android微信支付
支付接入流程官方文檔https://pay.weixin.qq.com/wiki/doc/api/app/app.php?chapter=8_5項目的應用(AppRegi
 Android開發之關於項目
本系列文章會根據項目的進度進行相關介紹,其會分為多個模塊,每個模塊互不依賴,各個模塊都是單獨的學習內容,如sqlite學習模塊,contacts聯系人模塊等。新建項目相信
 為Android添加一門新語言的解決辦法
雖然Android從2.3開始已經支持50種以上的語言,但是不是每種語言都有字體可以顯示。遇到一個新需求,有客戶要求對hindi語言的支持。於是上網找了一些資料,發現網上
 我的Android進階之旅------)Android中查看應用簽名信息
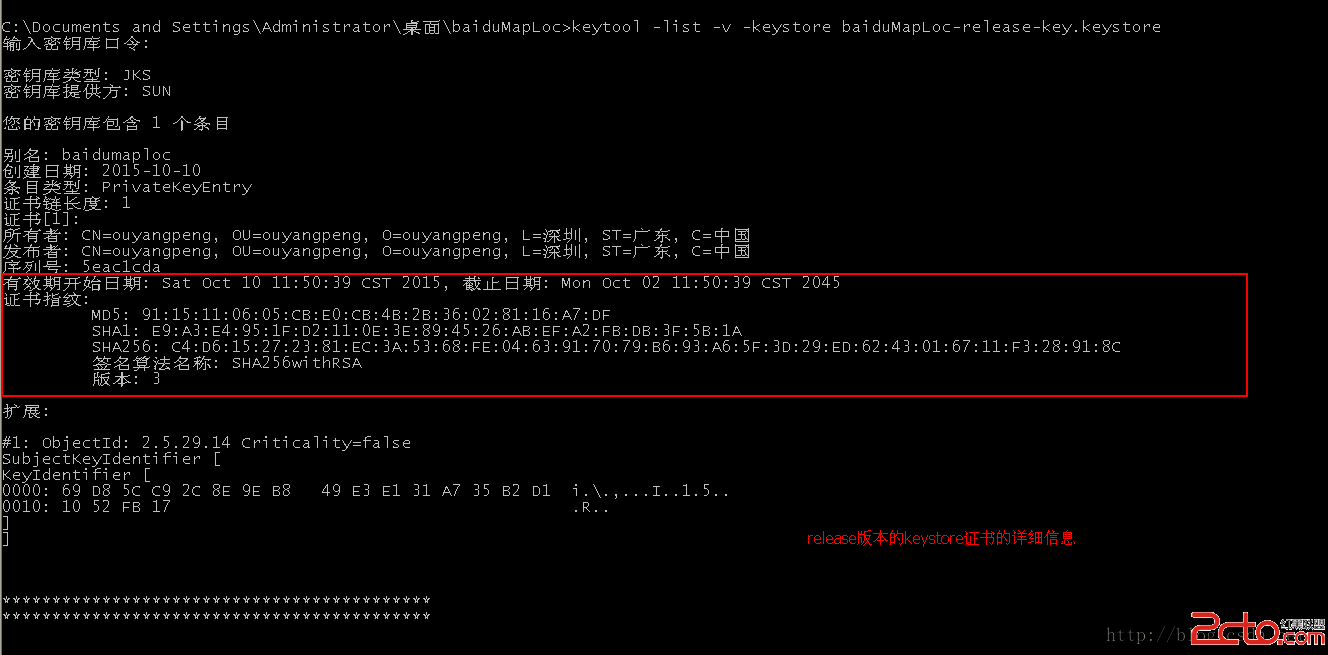
一、查看自己的證書簽名信息如上一篇文章《我的Android進階之旅------>Android中制作和查看自定義的Debug版本Android簽名證書 》地址:ht