編輯:關於Android編程
<p><?xml version="1.0" encoding="utf-8"?>
<TabHost xmlns:android="<a target="_blank" href="http://schemas.android.com/apk/res/android">http://schemas.android.com/apk/res/android</a>"
    android:id="@+id/tabhost"
    android:layout_width="fill_parent"
    android:layout_height="fill_parent" ></p><p>    <RelativeLayout
        android:layout_width="fill_parent"
        android:layout_height="wrap_content" ></p><p>        <LinearLayout
            android:id="@+id/tab_top"
            android:background="@color/red"
            android:orientation="horizontal"
            android:layout_width="fill_parent"
            android:layout_height="20dp"
            android:layout_alignParentTop="true" >
        </LinearLayout></p><p>        <FrameLayout
            android:id="@android:id/tabcontent"
            android:layout_width="fill_parent"
            android:background="@color/green"
            android:layout_height="wrap_content"
            android:layout_above="@id/tabs"
            android:layout_below="@id/tab_top" >
        </FrameLayout></p><p>        <TabWidget
            android:id="@+id/tabs"
            android:layout_width="fill_parent"
            android:background="@color/blue"
            android:layout_height="20dp"
            android:layout_alignParentBottom="true" >
        </TabWidget>
    </RelativeLayout></p><p></TabHost></p>
顯示為如下: 這說明以<TabHost>為頭的布局文件下可以很好的存在幀布局視圖。在上面可放一個view,在下面可放一個選項卡去完成切換中間幀布局內容。
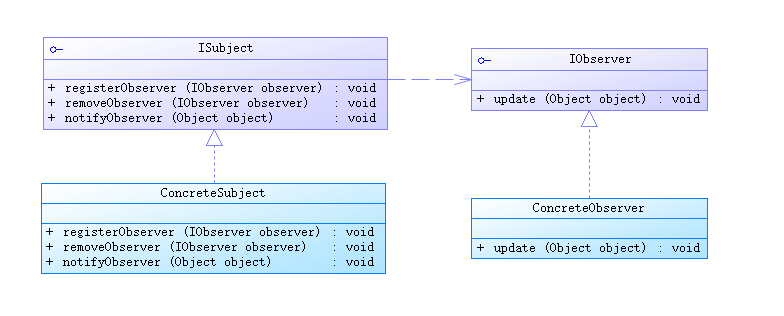
 java/android 設計模式學習筆記(2)---觀察者模式
這篇來講一下觀察者模式,觀察者模式在實際項目中使用的也是非常頻繁的,它最常用的地方是GUI系統、訂閱——發布系統等。因為這個模式的一個重要作用就是
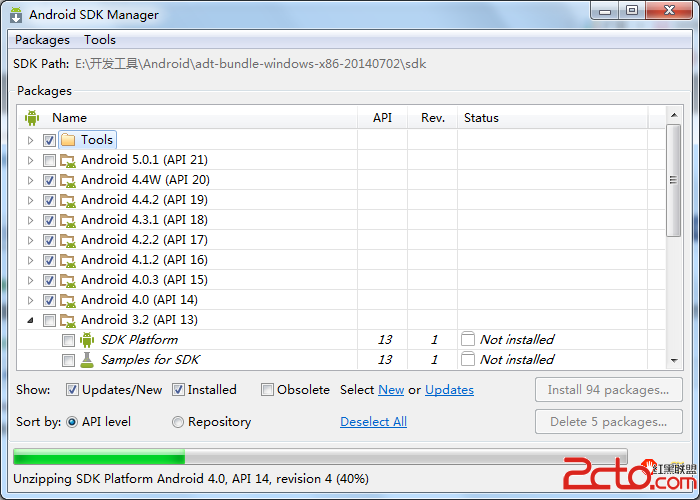
 加快Android SDK Manager的速度
1、明白Android SDK Manager是什麼? Android SDK Manager是用來安裝Android SDK的,裡面可以選擇不同版本的Android
 React Native自定義導航欄
經過之前的學習, 我們可以完成一個自定義導航欄了, 效果如下:我們需要創建一個 NaviBar.js 用來顯示頂部的導航欄, 還需要四個界面(Page1.js,Page2
 Android開發學習之使用百度語音識別SDK實現語音識別(中)
今天我們來繼續學習百度語音識別SDK的相關內容,今天我們以百度語音識別SDK提供的API接口為前提,來實現自己的語音識別交互界面。在正式開始今天的文章之前,我們首先來了解