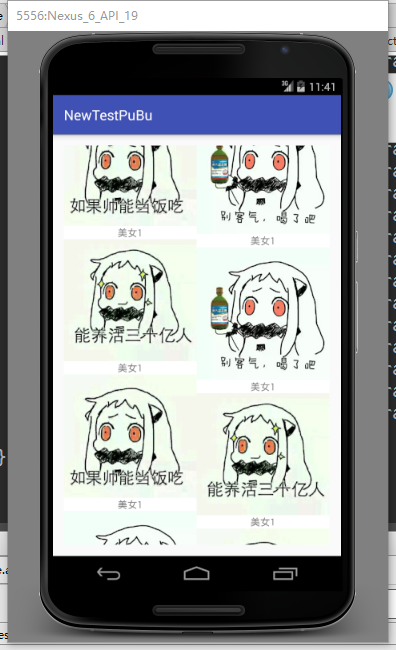
編輯:關於Android編程
public class MainActivity extends Activity {

	private Gallery gallery;

	private LayoutInflater inflater;

	private ImageSwitcher imageSwitcher;

	private int res[] = new int[] { R.drawable.ic_launcher, R.drawable.an01,
			R.drawable.an02, R.drawable.an03, R.drawable.an01, R.drawable.an02,
			R.drawable.an03 };

	@Override
	protected void onCreate(Bundle savedInstanceState) {
		super.onCreate(savedInstanceState);
		setContentView(R.layout.activity_main);

	//	inflater = (LayoutInflater) getSystemService(LAYOUT_INFLATER_SERVICE);

		/**
		 * 系統中有沒有合適的適配器
		 */
		gallery = (Gallery) findViewById(R.id.gallery1);

		// 獲取ImageView控件
		imageSwitcher = (ImageSwitcher) findViewById(R.id.imageSwitcher1);

		// 初始化一次工廠即可
		imageSwitcher.setFactory(new ImageSwitcher.ViewFactory() {

			// 設置圖片
			@Override
			public View makeView() {
				ImageView imageView = new ImageView(MainActivity.this);

				imageView.setScaleType(ImageView.ScaleType.FIT_CENTER);
				return imageView;
			}

		});

		// 加入動畫
		imageSwitcher.setInAnimation(AnimationUtils.loadAnimation(
				MainActivity.this, android.R.anim.fade_in));
		imageSwitcher.setOutAnimation(MainActivity.this,
				android.R.anim.fade_out);

		List<Map<String, Object>> data = new ArrayList<Map<String, Object>>();

		for (int i = 0; i < res.length; i++) {
			Map<String, Object> map = new HashMap<String, Object>();
			map.put("imageView", res[i]);

			data.add(map);
		}

		SimpleAdapter simpleAdapter = new SimpleAdapter(this, data,
				R.layout.activity_cell, new String[] { "imageView" },
				new int[] { R.id.imageView1 });

		gallery.setAdapter(simpleAdapter);

		// 注冊事件
		gallery.setOnItemClickListener(new AdapterView.OnItemClickListener() {

			@Override
			public void onItemClick(AdapterView<?> parent, View view,
					int position, long id) {

				// 獲取圖片資源
				int imageResId = res[position % res.length];

				// 設置imageSwithcer組件資源
				imageSwitcher.setImageResource(imageResId);

			}
		});
	}

	/*public class MyAdapter extends BaseAdapter {

		@Override
		public int getCount() {
			// TODO Auto-generated method stub
			return Integer.MAX_VALUE;
		}

		@Override
		public Object getItem(int position) {
			return res[position % res.length];
		}

		@Override
		public long getItemId(int position) {
			// TODO Auto-generated method stub
			return position;
		}

		@Override
		public View getView(int position, View convertView, ViewGroup parent) {
			View v = inflater.inflate(R.layout.activity_gallery, null);
			ImageView iv = (ImageView) v.findViewById(R.id.imageView1);
			int imageResId = res[position % res.length];
			System.out.println(position + "-------" + imageResId);
			iv.setImageResource(imageResId);
			return v;
		}

	}*/

}
<LinearLayout xmlns:android="http://schemas.android.com/apk/res/android"
    android:layout_width="match_parent"
    android:layout_height="match_parent"
    android:orientation="vertical" >

    <Gallery
        android:id="@+id/gallery1"
        android:layout_width="match_parent"
        android:layout_height="wrap_content"
        android:layout_marginTop="0dp" />

    <ImageSwitcher
        android:id="@+id/imageSwitcher1"
        android:layout_width="match_parent"
        android:layout_height="0dp"
        android:layout_weight="1" >

    </ImageSwitcher>

</LinearLayout>
<LinearLayout xmlns:android="http://schemas.android.com/apk/res/android"
    android:layout_width="match_parent"
    android:layout_height="match_parent" >

    <ImageView
        android:id="@+id/imageView1"
        android:layout_width="wrap_content"
        android:layout_height="wrap_content"
        android:src="@drawable/an01" />

</LinearLayout>
 Android greenDAO數據庫配置教程
一、環境配置1、在Android Studio中,在.src/main目錄下新建一個java-gen文件夾,和java文件夾同級。用於存放greenDAO生成的DaoMa
 android多線程-AsyncTask之工作原理深入解析(上)
前兩篇我們分析android的異步線程類HandlerThread與IntentService,它們都是android系統獨有的線程類,而android中還有另一個比較重
 android---UI---RecyclerView實現瀑布流
一.包引入dependencies { compile fileTree(dir: 'libs', include: ['*.jar'
 Android自定義控件:動畫類----alpha、scale、translate、rotate、set的xml屬性及用法
一、概述Android的animation由四種類型組成:C、scale、translate、rotate,對應android官方文檔地址:《Animation Reso