編輯:關於Android編程
又到了有空閒的時間,趁機寫一章教程先。
在本章教程中,我們將會學習Button控件的使用,同時順便說一下Toast提示控件。
在Android程序開發中,我們使用最多的用戶交互控件可能就是Button的了,而我們使用最多的事件估計也就是onclick事件了。
這些事件也是最簡單的事件,我們一般通過google自帶的API接口就可以調用了,我們具體看看怎麼做吧。
第一步。新建一個工程Ep.Toast,活動和主視圖名稱我都使用默認的了,設置一下視圖activity_main.xml:
[java]
<RelativeLayout xmlns:android="http://schemas.android.com/apk/res/android"
xmlns:tools="http://schemas.android.com/tools"
android:layout_width="match_parent"
android:layout_height="match_parent"
android:paddingBottom="@dimen/activity_vertical_margin"
android:paddingLeft="@dimen/activity_horizontal_margin"
android:paddingRight="@dimen/activity_horizontal_margin"
android:paddingTop="@dimen/activity_vertical_margin"
tools:context=".MainActivity" >
<TextView
android:id="@+id/textView1"
android:layout_width="wrap_content"
android:layout_height="wrap_content"
android:text="@string/hello_world" />
<Button
android:id="@+id/button1"
android:layout_width="wrap_content"
android:layout_height="wrap_content"
android:layout_alignParentRight="true"
android:layout_alignTop="@+id/textView1"
android:layout_marginRight="61dp"
android:text="確定" />
</RelativeLayout>
裡面就是一個文字標簽和一個按鈕控件。
第二步。我們寫核心文件——MainActivity.java,在這裡我會盡量多給你們注釋:
[java]
package com.example.ep.toast;
import android.os.Bundle;
import android.app.Activity;
import android.view.View;
import android.view.View.OnClickListener;
import android.widget.Button;
import android.widget.TextView;
import android.widget.Toast;
public class MainActivity extends Activity {
private TextView txtview1;
private Button btn1;
@Override
protected void onCreate(Bundle savedInstanceState) {
super.onCreate(savedInstanceState);
setContentView(R.layout.activity_main);
//綁定文字標簽控件
txtview1=(TextView)findViewById(R.id.textView1);
//綁定按鈕控件
btn1=(Button)findViewById(R.id.button1);
//添加一個點擊事件監聽器並實例化一個點擊事件的監聽
btn1.setOnClickListener(new OnClickListener() {
@Override
public void onClick(View v) {
//點擊按鈕後設置文字標簽
txtview1.setText("Joven");
//點擊按鈕後彈出提示框,裡面的參數是(綁定活動,提示內容,顯示時間)
Toast.makeText(MainActivity.this, "Joven", Toast.LENGTH_LONG).show();
}
});
}
}
最後我們來看看效果吧。
好了本章就講到這裡了,這些雖然都是些基礎得不能再基礎得東西。但是不管多麼龐大而復雜的項目,其實都是在這些東西上面建立起來的。知識都是積累才會變精華。
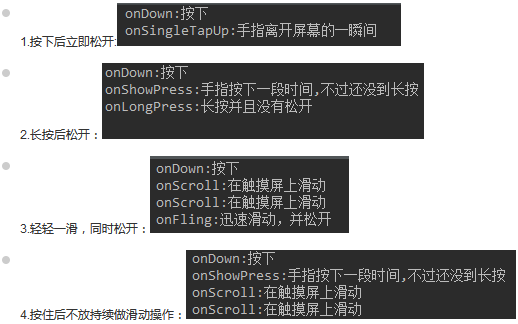
 事件處理機制之Gestures(手勢)
(一)概述手勢是:連續觸碰的行為,比如左右上下滑動屏幕,又或者畫一些不規則的幾何圖形! Android對上述兩種手勢行為都提供了支持:Android提供手勢檢測,並為手勢
 Android自定義ProgressDialog加載圖片
為了提高用戶體驗,我們肯定希望該Dialog能更加炫酷,讓用戶看著更舒服。那如何做呢,當然是我們自己定義一個ProgressDialog了。一、使用系統加載框mDialo
 Android實現把文件存放在SDCard的方法
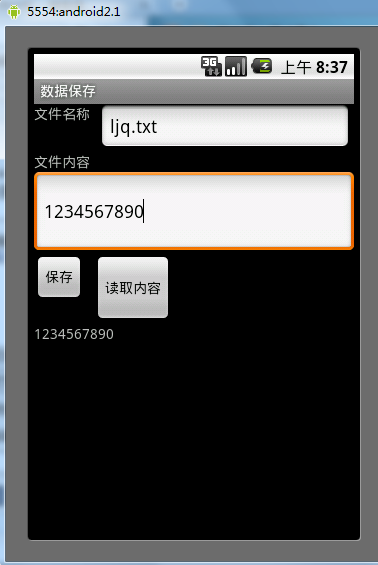
本文實例講述了Android實現把文件存放在SDCard的方法。分享給大家供大家參考。具體如下:使用Activity的openFileOutput()方法保存文件,文件是
 Android中Fab(FloatingActionButton)實現上下滑動的漸變效果
前言Promoted Actions是指一種操作按鈕,它不是放在actionbar中,而是直接在可見的UI布局中(當然這裡的UI指的是setContentView所管轄的