編輯:關於Android編程
android的提醒
android 的提醒主要有3中方式:Toast Notification,Status Bar Notification,Dialog Notification;在Standup Timer 中使用了很多Dialog notification。特別是在刪除某項時,彈出的確認對話框。Dialog Notification 主要分為四種:Alert Dialog,ProgressDialog ,DatePickerDialog ,TimePickerDialog。本文將重點講述Alert Dialog。
Alert Dialog
Alert Dialog的創建比較簡單,我們將按步驟來創建一個帶有EditText view的警告對話框,通過該對話框創建Standup timer中參加會議的團隊。
第一步,重寫 onCreateDialog方法,根據ID創建不同的對話框。
[java]
@Override
protected Dialog onCreateDialog(int id)
{
switch(id)
{
case CREATE_TEAM_DIALOG:
if (createTeamDialog ==null)
{
AlertDialog.Builder builder=new AlertDialog.Builder(this);
builder.setTitle(R.string.add_team);
builder.setView(getTextEntryView());
builder.setCancelable(true);
//設置確定按鈕和監聽其事件
builder.setPositiveButton(R.string .ok, addTeamButtonListener());
//設定否定按鈕和監聽其事件
builder.setNegativeButton(R.string.revert, cancelListener());
createTeamDialog = builder.create();
}
return createTeamDialog;
default:
Logger.e("Attempting to create an unkonwn dialog with an id of "+ id);
returnnull;
}
}
@Override
protected Dialog onCreateDialog(int id)
{
switch(id)
{
case CREATE_TEAM_DIALOG:
if (createTeamDialog ==null)
{
AlertDialog.Builder builder=new AlertDialog.Builder(this);
builder.setTitle(R.string.add_team);
builder.setView(getTextEntryView());
builder.setCancelable(true);
//設置確定按鈕和監聽其事件
builder.setPositiveButton(R.string .ok, addTeamButtonListener());
//設定否定按鈕和監聽其事件
builder.setNegativeButton(R.string.revert, cancelListener());
createTeamDialog = builder.create();
}
return createTeamDialog;
default:
Logger.e("Attempting to create an unkonwn dialog with an id of "+ id);
returnnull;
}
}AlertDialog.Builder 是用來創建具體警告對話框的。
setTitle()為設置對話框的標題;
setView(View)用於給對話框加載View,如果需要的話,這裡加載的是一個EditText。
setCancelable(boolean) 設置返回鍵是否能撤銷對話框,一般為true
setPositiveButton()設置按下表示確定按鈕時按鈕的text,和按鈕的事件監聽器
setNegativeButton()設置取消按鈕的text 和監聽器
另外如果對話框不需要特別的視圖控件的話可以不使用setView()。直接通過 setMessage(Msg)來顯示你需要的展示的警告信息。
Builder各項屬性設置完成後,即可通過builder.create(),創建AlertDialog對話框。
第二步展示對話框
展示對話框非常簡單,在你需要彈出提醒的操作裡加入showDialog(id) 即可。通常根據id對對話框進行封裝。
[java]
privatevoid displayAddTeamDialog() {
showDialog(CREATE_TEAM_DIALOG);
}
privatevoid displayAddTeamDialog() {
showDialog(CREATE_TEAM_DIALOG);
}第三步編寫對話框中按鈕事件
這與普通按鈕的事件編寫相似,這裡按鈕的事件處理的是添加一個團隊操作。
[java]
private OnClickListener addTeamButtonListener() {
returnnew DialogInterface.OnClickListener() {
publicvoid onClick(DialogInterface dialog, int id) {
EditText collectedTextView = (EditText) getTextEntryView().findViewById(R.id.collected_text);
String name = collectedTextView.getText().toString();
Team.create(name, TeamListActivity.this);
teamListAdapter.add(name);
}
};
}
private OnClickListener addTeamButtonListener() {
returnnew DialogInterface.OnClickListener() {
publicvoid onClick(DialogInterface dialog, int id) {
EditText collectedTextView = (EditText) getTextEntryView().findViewById(R.id.collected_text);
String name = collectedTextView.getText().toString();
Team.create(name, TeamListActivity.this);
teamListAdapter.add(name);
}
};
}返回的是 DialogInterface 下的 OnClickListener。
[java]
private OnClickListener cancelListener() {
returnnew DialogInterface.OnClickListener() {
@Override
publicvoid onClick(DialogInterface dialog, int which) {
dialog.cancel();
}
};
}
private OnClickListener cancelListener() {
returnnew DialogInterface.OnClickListener() {
@Override
publicvoid onClick(DialogInterface dialog, int which) {
dialog.cancel();
}
};
}撤銷對話框操作,撤出警告。
關於setView
代碼中有幾處調用了getTextEntryView方法,這是一個返回View的自定義方法。setView(View) 可以讓展現你想要的View,用來接收用戶的輸入信息等。
[java]
synchronizedprotected View getTextEntryView() {
if (txtEntryView ==null) {
LayoutInflater factory = LayoutInflater.from(this);
txtEntryView = factory.inflate(R.layout.collect_text, null);
}
return txtEntryView;
}
synchronizedprotected View getTextEntryView() {
if (txtEntryView ==null) {
LayoutInflater factory = LayoutInflater.from(this);
txtEntryView = factory.inflate(R.layout.collect_text, null);
}
return txtEntryView;
}LayoutInflater 可以將res 文件夾下的layout 布局的XML 轉化為 View。也可以通過 getLayoutInflater() 或 getSystemService(String) 方法創建LayoutInflater
[java]
LayoutInflater inflater = (LayoutInflater)context.getSystemService
Context.LAYOUT_INFLATER_SERVICE);
LayoutInflater inflater = (LayoutInflater)context.getSystemService
Context.LAYOUT_INFLATER_SERVICE);inflate(int resId,ViewGroup root),將預先定義的XML布局文件轉化為View
[html]
<?xml version="1.0" encoding="utf-8"?>
<EditText xmlns:android="http://schemas.android.com/apk/res/android" android:id="@+id/collected_text"
android:layout_width="fill_parent" android:layout_height="fill_parent"
android:padding="5dp"/>
<?xml version="1.0" encoding="utf-8"?>
<EditText xmlns:android="http://schemas.android.com/apk/res/android" android:id="@+id/collected_text"
android:layout_width="fill_parent" android:layout_height="fill_parent"
android:padding="5dp"/>
 android --多線程下載過程分析
多線程下載文件的過程是:(1)首先獲得下載文件的長度,然後設置本地文件的長度。HttpURLConnection.getContentLength();//獲取下載文件的
 wipe什麼意思?安卓手機wipe教程詳解
什麼是wipe?wipe什麼意思?雙wipe又是什麼?安卓手機如何wipe?對於剛接觸安卓手機的同學來說是比較模糊的概念,那到底wipe是什麼意思呢,下面來
 android---UI---RecyclerView實現瀑布流
一.包引入dependencies { compile fileTree(dir: 'libs', include: ['*.jar'
 Android插件化之資源動態加載
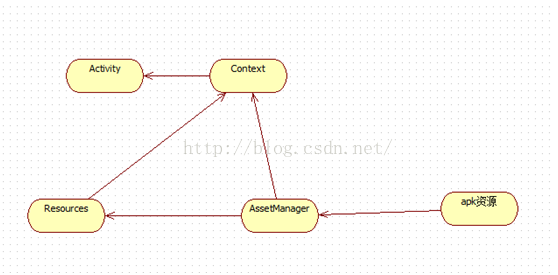
Android插件化之資源動態加載一.概述Android插件化的一個重要問題就是插件資源訪問問題,先列出會面對的問題1.如何加載插件資源2.如何處理插件資源與宿主資源的處