編輯:關於Android編程
WIFI定位其實和基站定位都差不多,只需要把WIFI的MAC地址取到傳給google就行了,下面是具體實現!
[java]
import java.io.Serializable;
import android.content.Context;
import android.net.wifi.WifiManager;
import android.util.Log;
/**
* @author yangzhiqiang
*
*/
public class WiFiInfoManager implements Serializable {
/**
*
*/
private static final long serialVersionUID = -4582739827003032383L;
private Context context;
public WiFiInfoManager(Context context) {
super();
this.context = context;
}
public WifiInfo getWifiInfo() {
WifiManager manager = (WifiManager) context
.getSystemService(Context.WIFI_SERVICE);
WifiInfo info = new WifiInfo();
info.mac = manager.getConnectionInfo().getBSSID();
Log.i("TAG", "WIFI MAC is:" + info.mac);
return info;
}
public class WifiInfo {
public String mac;
public WifiInfo() {
super();
}
}
}
上面是取到WIFI的mac地址的方法,下面是把地址發送給google服務器,代碼如下:
[java]
public static Location getWIFILocation(WifiInfo wifi) {
if (wifi == null) {
Log.i("TAG", "wifi is null.");
return null;
}
DefaultHttpClient client = new DefaultHttpClient();
HttpPost post = new HttpPost("http://www.google.com/loc/json");
JSONObject holder = new JSONObject();
try {
holder.put("version", "1.1.0");
holder.put("host", "maps.google.com");
JSONObject data;
JSONArray array = new JSONArray();
if (wifi.mac != null && wifi.mac.trim().length() > 0) {
data = new JSONObject();
data.put("mac_address", wifi.mac);
data.put("signal_strength", 8);
data.put("age", 0);
array.put(data);
}
holder.put("wifi_towers", array);
Log.i("TAG", "request json:" + holder.toString());
StringEntity se = new StringEntity(holder.toString());
post.setEntity(se);
HttpResponse resp = client.execute(post);
int state = resp.getStatusLine().getStatusCode();
if (state == HttpStatus.SC_OK) {
HttpEntity entity = resp.getEntity();
if (entity != null) {
BufferedReader br = new BufferedReader(
new InputStreamReader(entity.getContent()));
StringBuffer sb = new StringBuffer();
String resute = "";
while ((resute = br.readLine()) != null) {
sb.append(resute);
}
br.close();
Log.i("TAG", "response json:" + sb.toString());
data = new JSONObject(sb.toString());
data = (JSONObject) data.get("location");
Location loc = new Location(
android.location.LocationManager.NETWORK_PROVIDER);
loc.setLatitude((Double) data.get("latitude"));
loc.setLongitude((Double) data.get("longitude"));
loc.setAccuracy(Float.parseFloat(data.get("accuracy")
.toString()));
loc.setTime(System.currentTimeMillis());
return loc;
} else {
return null;
}
} else {
Log.v("TAG", state + "");
return null;
}
} catch (Exception e) {
Log.e("TAG", e.getMessage());
return null;
}
}
 Android學習筆記十二.深入理解LauncherActvity 之LauncherActivity、PreferenceActivity、PreferenceFragment
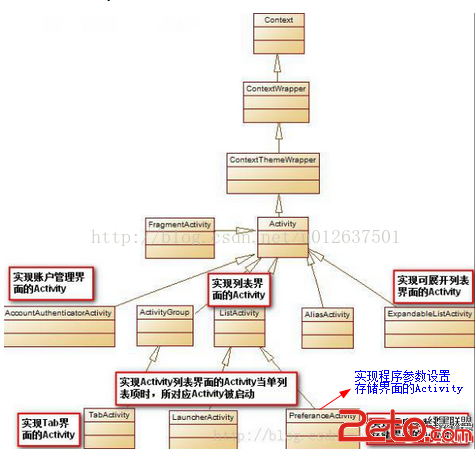
深入理解LauncherActvity 之LauncherActivity、PreferenceActivity、PreferenceFragment 從下圖我們可以知道
 android中選中菜單的顯示跳轉和隱式跳轉的實例介紹
查了好多資料,現發還是不全,干脆自己整理吧,至少保證在我的做法正確的,以免誤導讀者,也是給自己做個記錄吧!簡介android供給了三種菜單類型,分別為options me
 淺析Android App的相對布局RelativeLayout
一、什麼是相對布局相對布局是另外一種控件擺放的方式相對布局是通過指定當前控件與兄弟控件或者父控件之間的相對位置,從而達到相對的位置二、為什麼要使用相對布局相對於線性布局u
 安卓IPC之aidl使用(一)--aidl常見使用
在android上有很多跨進程的通訊方法例如aidl,messenger,ContentProvider,BroadCast,Socket等等,安卓進程間通信(IPC)
 Android源碼淺析(三)——Android AOSP 5.1.1源碼的同步sync和編譯make,搭建Samba服務器進行更便捷的燒錄刷機
最近比較忙,而且又要維護自己的博客,視頻和公眾號,也就沒仔細的梳理源碼