編輯:關於Android編程
昨天UI妹子給了給需求,展示水平分頁效果,而且第二頁要默認顯示一部分,提示用戶水平可以滑動,先上效果圖:
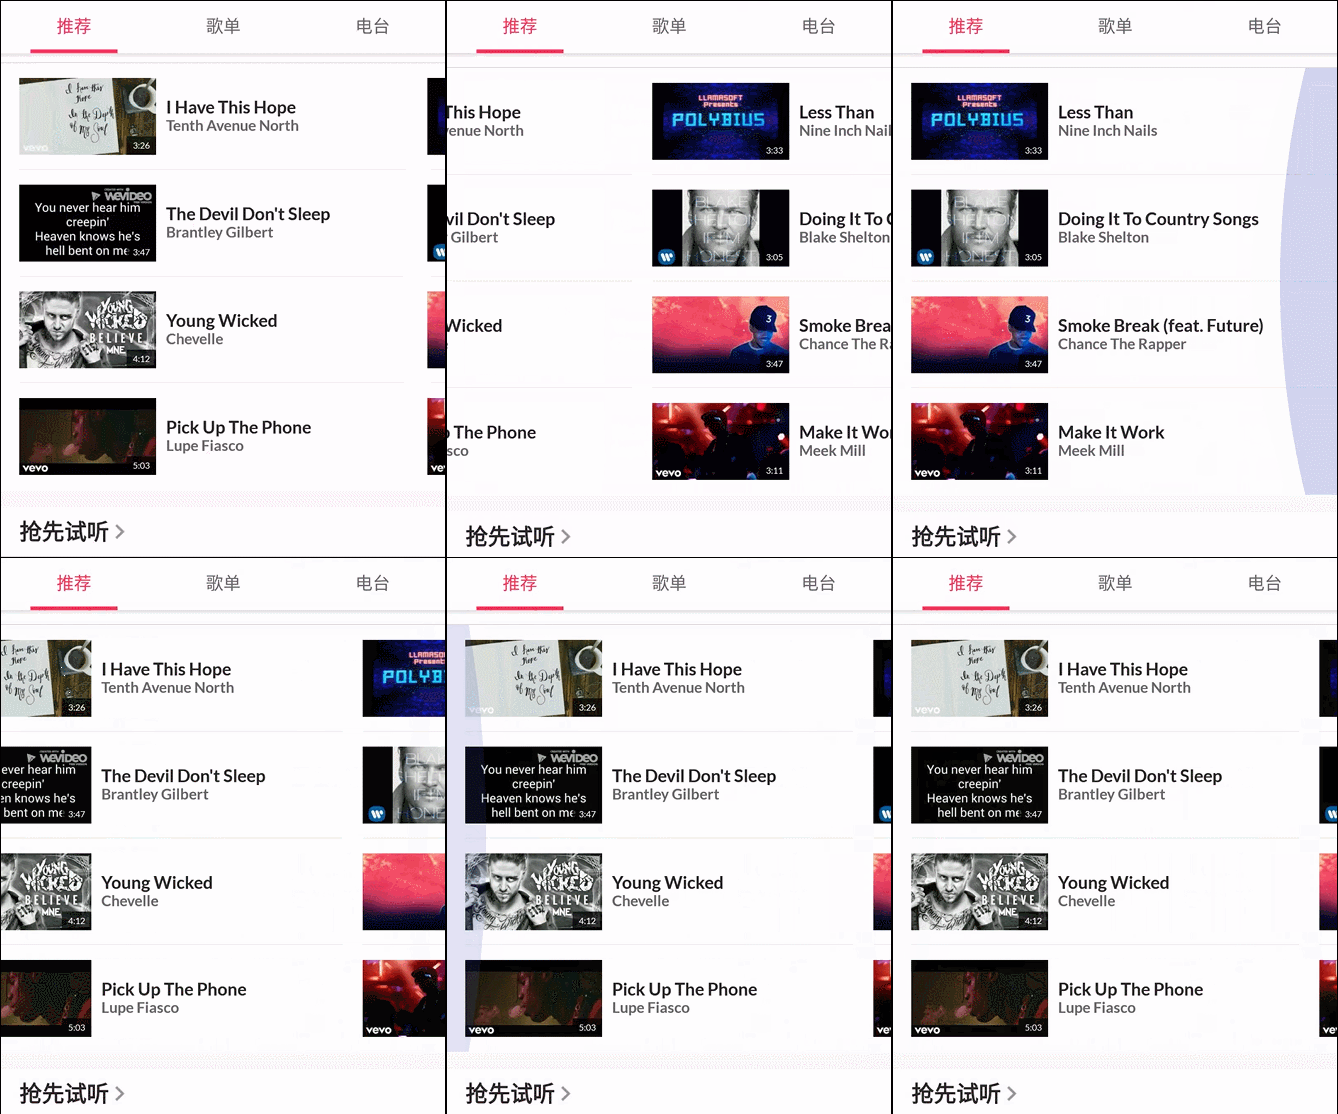
很明顯橫向滑動的分頁,第一反應就是使用ViewPager,畢竟只要通過自定義ViewPager,實現這個效果還是很容易,但是實際中問題時,當前模塊是Recyclerview中某一個Holder,為了性能,肯定盡量使用Recyclerview去復用View,而且ViewPager並不能復用,所以考慮之後,還是要用Recyclerview去實現。
解決思路
既然打算用Recyclerview實現,很明顯這就可以用GridLayoutManager處理橫向滑動的列表,初步實現橫向列表的效果,列數為4的橫向分頁效果
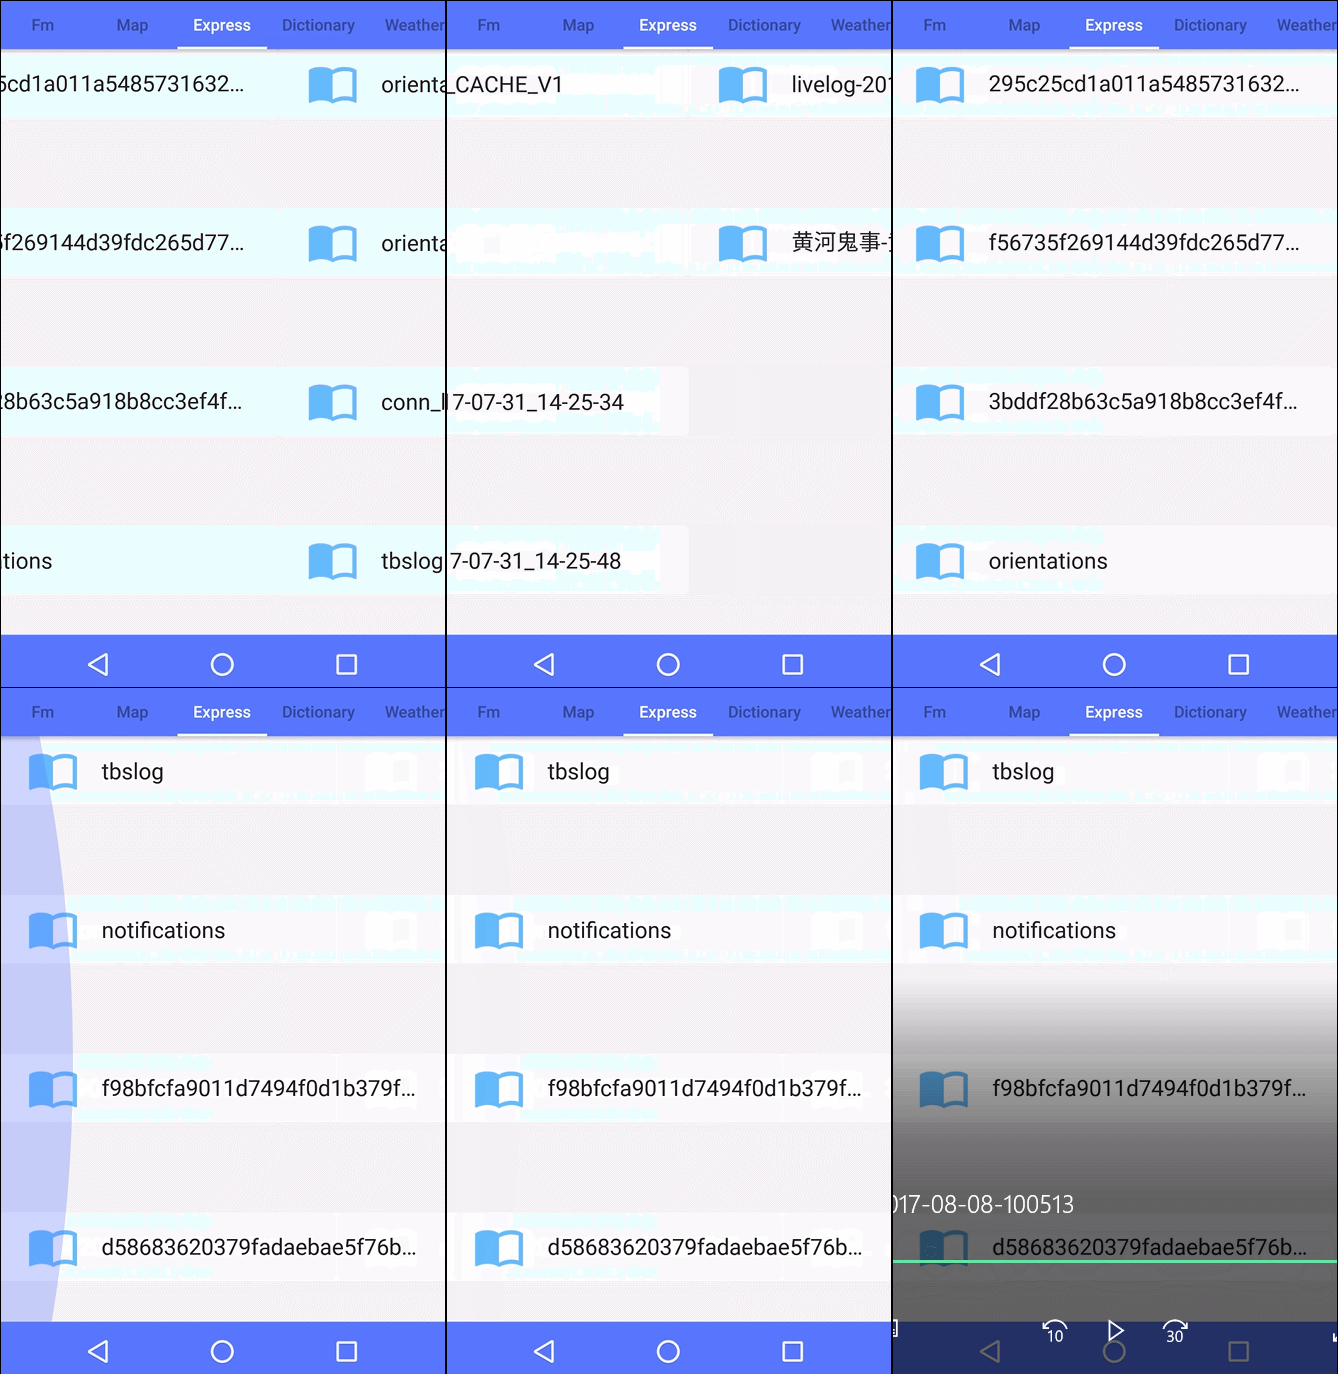
橫向列表效果是實現了,但是並沒有達到設計稿的要求,第二頁要默認顯示一部分,那麼就要從水平方向上去思考解決問題,既然第二頁要顯示一部分,假如顯示16dp,那麼將第一頁列表寬度減少右邊距16dp,第二頁就可以在第一頁顯示了。
在Recyclerview的Adapter中,先上布局:
<?xml version="1.0" encoding="utf-8"?>
<RelativeLayout xmlns:android="http://schemas.android.com/apk/res/android"
  xmlns:app="http://schemas.android.com/apk/res-auto"
  xmlns:tools="http://schemas.android.com/tools"
  android:id="@+id/rl_parent"
  android:layout_width="match_parent"
  android:layout_height="55dp"
  android:background="@drawable/news_click_bg"
  android:clickable="true"
  android:gravity="center_vertical">

  <ImageView
    android:id="@+id/iv_img"
    android:layout_width="48dp"
    android:layout_height="48dp"
    android:layout_centerVertical="true"
     android:layout_marginLeft="16dp"
    android:padding="3dp"
    android:src="@drawable/icon_book_default"
    android:tint="@color/blue" />

  <com.ddz.lifestyle.baseview.customview.RobotoTextView
    android:id="@+id/tv_title"
    android:layout_width="match_parent"
    android:layout_height="wrap_content"
    android:layout_centerVertical="true"
    android:layout_marginLeft="15dp"
    android:layout_marginRight="20dp"
    android:layout_toRightOf="@+id/iv_img"
    android:ellipsize="end"
    android:lines="1"
    android:textSize="18sp"
    app:typeface="roboto_regular"
    tools:text="name" />

  <ImageView
    android:id="@+id/iv_menu"
    android:layout_width="34dp"
    android:layout_height="34dp"
    android:layout_alignParentRight="true"
    android:layout_centerVertical="true"
    android:layout_marginRight="10dp"
    android:padding="10dp"
    android:src="@drawable/menu_right"
    android:visibility="invisible" />
</RelativeLayout>```
在onBindViewHolder方法中,去修改邊距
@Override
public void onBindViewHolder(ItemHolder holder, int position) {
  if (null == bean) {
    return;
  }
  RelativeLayout.LayoutParams params = new RelativeLayout.LayoutParams(ViewGroup.LayoutParams.MATCH_PARENT, DensityUtil.dip2px(86));   //DensityUtil是px轉dp的工具類
  int screenWidth = TCommonUtils.getScreenWidth(context);
  if (position <= 3) { //因為每列數量為4個,那麼只需要將前4個item的寬度減少32dp
    screenWidth -= DensityUtil.dip2px(32); //寬度減少32dp,即左右各16dp
    params.width = screenWidth;
  } else {
    params.width = screenWidth;
  }
  holder.rlParent.setLayoutParams(params);
  holder.tvTitle.setText(bean.get(position).getTitle());
}```
來看看效果
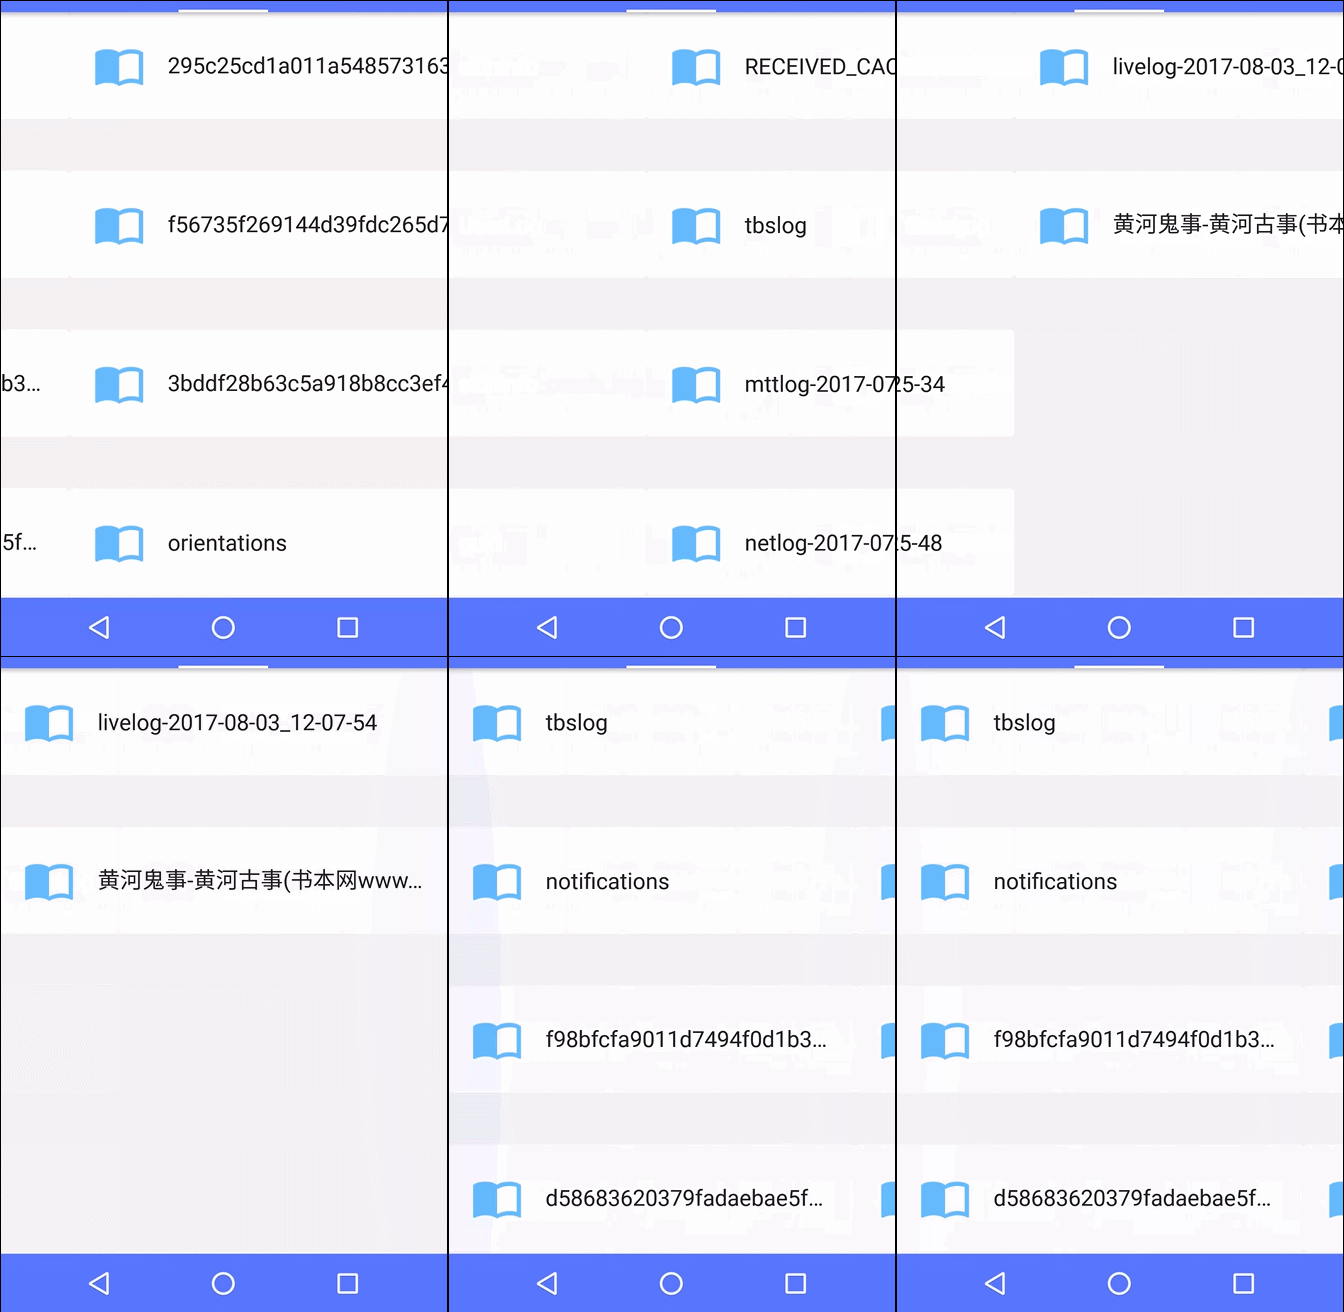
可以看到默認第二頁可以顯示一部分,而且後面每一頁都正常顯示,沒有像第二頁一樣侵入上一頁中
總結
實現這種分頁效果的方法有很多,但是選擇最容易並且效率最高的方式,才是開發中需要的。
以上就是本文的全部內容,希望對大家的學習有所幫助,也希望大家多多支持本站。
 Android仿IOS底部彈出對話框
在Android開發過程中,常常會因為感覺Android自帶的Dialog的樣式很丑,項目開發過程中會影響整體效果,會使得開發過程很是憂傷....(話唠時間結束!)本文我
 Android數據庫 之 SQLite數據庫
一、關系型數據庫SQLIte 每個應用程序都要使用數據,Android應用程序也不例外,Android使用開源的、與操作系統無關的SQL數據庫&
 安卓APK瘦身
之前打包的時候直接就用eclipse或者android studio直接生成簽名文件,並沒有關心大小問題,最近有人問我有沒有對APK進行瘦身,對這方面內容一致沒有關注過,
 MUI窗口管理
1、頁面初始化在app開發中,若要使用HTML5+擴展api,必須等plusready事件發生後才能正常使用,mui將該事件封裝成了mui.plusReady()方法,涉