編輯:Android開發教程
前幾個月剛接觸Android的時候做了一個小項目,其中也用到了類似刮刮樂的效果,現在把代碼貼出來
首先要做一個類似橡皮擦的東西吧,然後才能把紙上的筆跡擦除
/**
 * FileName: SplashActivity.java
 *
 * @desc 橡皮擦功能,類似刮刮樂效果
 * @author HTP
 * @Date 20140311
 * @version 1.00
 */
public class Text_Rubbler extends TextView {

    private float TOUCH_TOLERANCE; // 填充距離,使線條更自然,柔和,值越小,越柔和。

    // private final int bgColor;
    // 位圖
    private Bitmap mBitmap;
    // 畫布
    private Canvas mCanvas;
    // 畫筆
    private Paint mPaint;
    private Path mPath;
    private float mX, mY;

    private boolean isDraw = false;

    public Text_Rubbler(Context context) {
        /**
         * @param context 上下文
         */
        super(context);

    }

    public Text_Rubbler(Context context, AttributeSet attrs, int defStyle) {
        super(context, attrs, defStyle);
        // bgColor =
        // attrs.getAttributeIntValue("http://schemas.android.com/apk/res/android",
        // "textColor", 0xFFFFFF);
        // System.out.println("Color:"+bgColor);
    }

    public Text_Rubbler(Context context, AttributeSet attrs) {
        super(context, attrs);
        // bgColor =
        // attrs.getAttributeIntValue("http://schemas.android.com/apk/res/android",
        // "textColor", 0xFFFFFF);
        // System.out.println(bgColor);
        // System.out.println(attrs.getAttributeValue("http://schemas.android.com/apk/res/android",
        // "layout_width"));
    }

    @Override
    protected void onDraw(Canvas canvas) {
        super.onDraw(canvas);
        if (isDraw) {

            mCanvas.drawPath(mPath, mPaint);
            // mCanvas.drawPoint(mX, mY, mPaint);
            canvas.drawBitmap(mBitmap, 0, 0, null);
        }
    }

    /**
     * 開啟檫除功能
     *
     * @param bgColor
     *            覆蓋的背景顏色
     * @param paintStrokeWidth
     *            觸點(橡皮)寬度
     * @param touchTolerance
     *            填充距離,值越小,越柔和。
     */
    public void beginRubbler(final int bgColor, final int paintStrokeWidth,
            float touchTolerance) {
        TOUCH_TOLERANCE = touchTolerance;
        // 設置畫筆
        mPaint = new Paint();
        // mPaint.setAlpha(0);
        // 畫筆劃過的痕跡就變成透明色了
        mPaint.setColor(Color.BLACK); // 此處不能為透明色
        mPaint.setXfermode(new PorterDuffXfermode(PorterDuff.Mode.DST_OUT));
        // 或者
        // mPaint.setAlpha(0);
        // mPaint.setXfermode(new PorterDuffXfermode(PorterDuff.Mode.DST_IN));

        mPaint.setAntiAlias(true);
        mPaint.setDither(true);
        mPaint.setStyle(Paint.Style.STROKE);
        mPaint.setStrokeJoin(Paint.Join.ROUND); // 前圓角
        mPaint.setStrokeCap(Paint.Cap.ROUND); // 後圓角
        mPaint.setStrokeWidth(paintStrokeWidth); // 筆寬

        // 痕跡
        mPath = new Path();
        ;
        // 覆蓋
        // if (getLayoutParams().width == LayoutParams.FILL_PARENT) {
        //
        // }
        mBitmap = Bitmap.createBitmap(getLayoutParams().width,
                getLayoutParams().height, Config.ARGB_8888);
        mCanvas = new Canvas(mBitmap);

        mCanvas.drawColor(bgColor);
        isDraw = true;
    }

    @Override
    public boolean onTouchEvent(MotionEvent event) {
        if (!isDraw) {
            return true;
        }
        switch (event.getAction()) {
        case MotionEvent.ACTION_DOWN: // 觸點按下
            // touchDown(event.getRawX(),event.getRawY());
            touchDown(event.getX(), event.getY());
            invalidate();
            break;
        case MotionEvent.ACTION_MOVE: // 觸點移動
            touchMove(event.getX(), event.getY());
            invalidate();
            break;
        case MotionEvent.ACTION_UP: // 觸點彈起
            touchUp(event.getX(), event.getY());
            invalidate();
            break;
        default:
            break;
        }
        return true;
    }

    private void touchDown(float x, float y) {
        mPath.reset();
        mPath.moveTo(x, y);
        mX = x;
        mY = y;
    }

    private void touchMove(float x, float y) {
        float dx = Math.abs(x - mX);
        float dy = Math.abs(y - mY);
        if (dx >= TOUCH_TOLERANCE || dy >= TOUCH_TOLERANCE) {
            mPath.quadTo(mX, mY, (x + mX) / 2, (y + mY) / 2);
            mX = x;
            mY = y;
        }

    }

    private void touchUp(float x, float y) {
        mPath.lineTo(x, y);
        mCanvas.drawPath(mPath, mPaint);
        mPath.reset();
    }

}
 Android開發入門(八)使用活動欄 8.1 操縱ActionBar
除了fragments(碎片),在Android3和4中新增加的特性,還有ActionBar(活動欄)。ActionBar位於傳 統標題欄的位置,就在設備屏幕的頂部。Ac
 Android開發入門(一)詳解活動 1.3 隱藏Activity的標題
如果願意的話,可以把Activity的標題欄給隱藏了。只需要調用requestWindowFeature()方法,同時傳遞 Window.FEATURE_NO_TITLE
 Android app性能測試總結(繼續更新中)
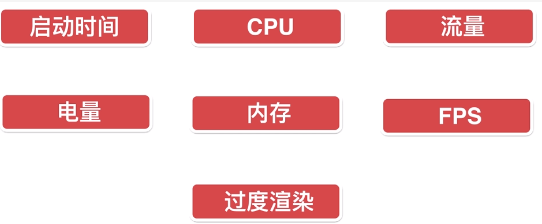
Android app性能測試總結(持續更新中)1.性能測試的幾個指標:
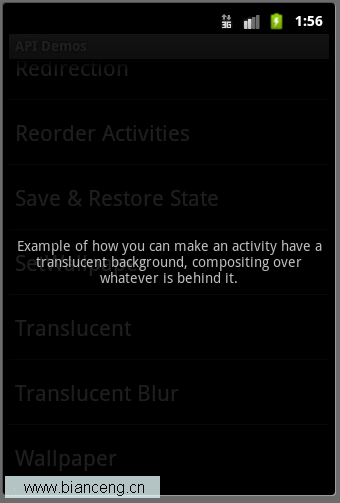
 Android ApiDemos示例解析(16) App->Activity->Translucent
Activity分類示例的最後幾個例子是來顯示半透明Activity。例子大同小異。實現Activity的半透明效果主要是通過Style和 Theme來實現的。看看Tra