編輯:Android開發教程
as 模塊 使用 android stdio modules
1.在gradle 中添加 變量
# Project-wide Gradle settings.

# IDE (e.g. Android Studio) users:
# Gradle settings configured through the IDE *will override*
# any settings specified in this file.

# For more details on how to configure your build environment visit
# http://www.gradle.org/docs/current/userguide/build_environment.html

# Specifies the JVM arguments used for the daemon process.
# The setting is particularly useful for tweaking memory settings.
org.gradle.jvmargs=-Xmx1536m

# When configured, Gradle will run in incubating parallel mode.
# This option should only be used with decoupled projects. More details, visit
# http://www.gradle.org/docs/current/userguide/multi_project_builds.html#sec:decoupled_projects
# org.gradle.parallel=true
# org.gradle.parallel=true
COMPILE_SDK_VERSION=24
BUILD_TOOLS_VERSION=24.0.3
JUNIT_VERSION=4.12
SUPPORT_VERSION=24.2.1
#verticalrefreshlayout
LIB_MINI_SDK_VERSION=16
LIB_TARGET_SDK_VERSION=24
#sample
SAMPLE_MIN_SDK_VERSION=16
SAMPLE_TARGET_SDK_VERSION=23
2.修改app 中 引用
apply plugin: 'com.android.application'

android {
    compileSdkVersion Integer.parseInt(COMPILE_SDK_VERSION)
    buildToolsVersion BUILD_TOOLS_VERSION
    defaultConfig {
        applicationId "cn.baoyou.curiousby.com.newrproject"
        minSdkVersion SAMPLE_MIN_SDK_VERSION
        targetSdkVersion SAMPLE_TARGET_SDK_VERSION
        versionCode 1
        versionName "1.0"
        testInstrumentationRunner "android.support.test.runner.AndroidJUnitRunner"
    }
    buildTypes {
        release {
            minifyEnabled false
            proguardFiles getDefaultProguardFile('proguard-android.txt'), 'proguard-rules.pro'
        }
    }
}

dependencies {
    compile fileTree(dir: 'libs', include: ['*.jar'])
    androidTestCompile('com.android.support.test.espresso:espresso-core:2.2.2', {
        exclude group: 'com.android.support', module: 'support-annotations'
    })
    compile "com.android.support:appcompat-v7:$SUPPORT_VERSION"
    compile "com.android.support:recyclerview-v7:$SUPPORT_VERSION"
    compile "com.android.support:design:$SUPPORT_VERSION"


    compile 'com.tomergoldst.android:tooltips:1.0.6'
    compile 'q.rorbin:badgeview:1.0.5'
    compile 'com.muddzdev:styleabletoast:1.0.5'
    compile 'com.wang.avi:library:2.1.3'


    testCompile "junit:junit:$JUNIT_VERSION"
    compile project(":verticalrefreshlayout")
    compile project(":xrecyclerview")
}
3. 選擇 file -> new -> import module
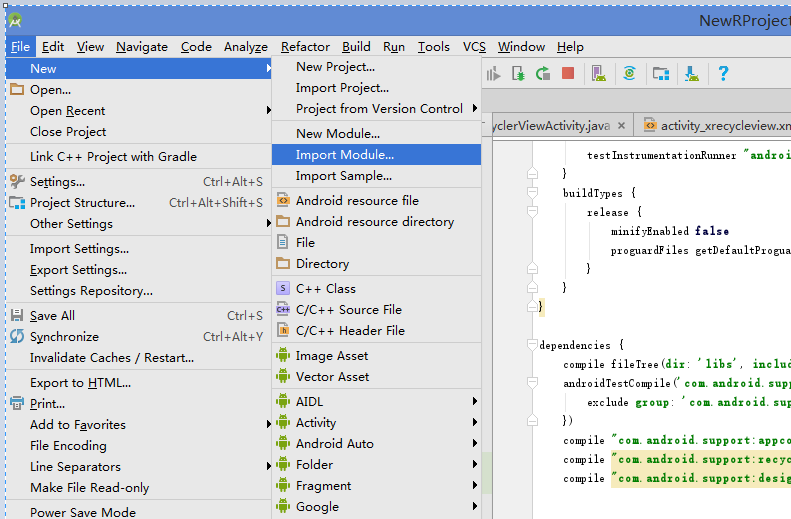
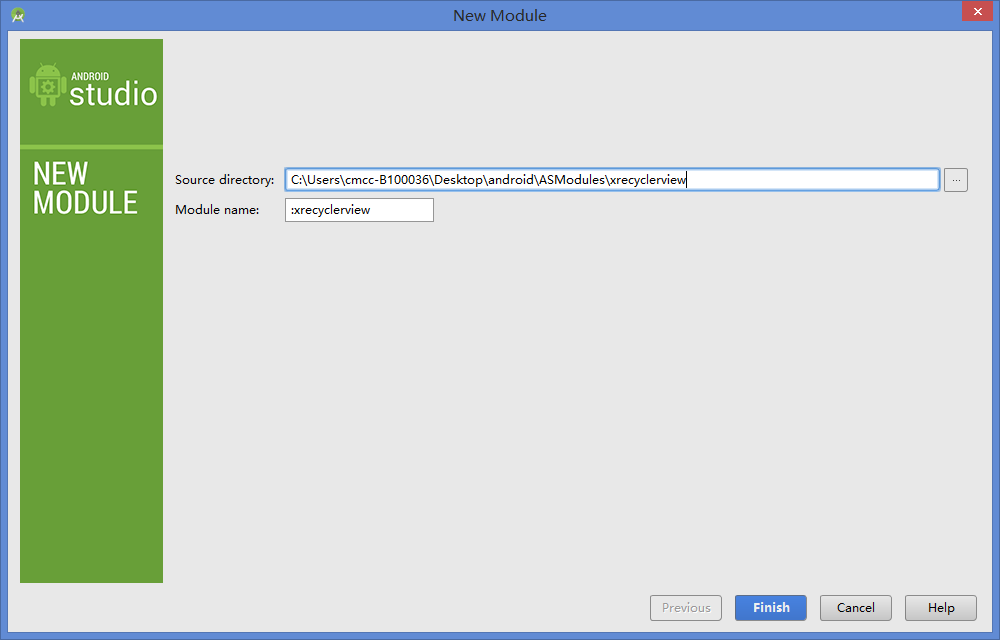
3. 下載 github 上一些開源 module 引入
本文 是引用 github xrecyclerview 鏈接https://github.com/curoiusby/XRecyclerView
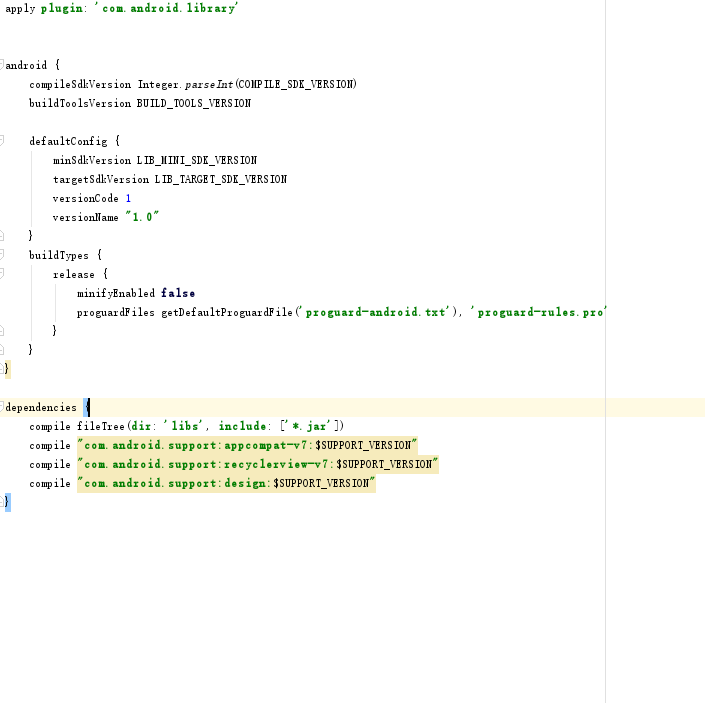
4. 修改開源 module 中 配置
5. snyc now
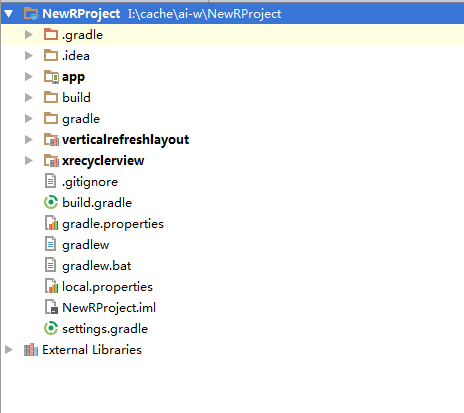
6.test
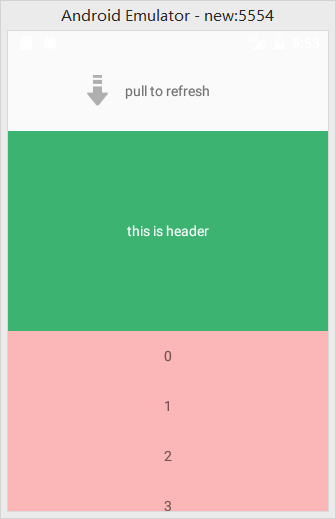
補充內容:
1.出現以下錯誤

在 gradle 中添加
 configurations.all {
        resolutionStrategy.force 'com.google.code.findbugs:jsr305:2.0.1'
    }
2.出現 com.android.ide.common.process.ProcessException錯誤
這個問題的出現是在將eclipse項目導入到Android Studio中,由(.9.png)圖片造成的,現在的解決方法是將其換成png圖片
3. Error:(1, 1) 錯誤: 非法字符: '\ufeff'
沒有看見 明顯 亂碼錯誤等
文件 內部 編碼格式 ,重新 新建該類,並把內容 復制進去 ,即可解決
4. 一下 錯誤
Error:Execution failed for task ':app:transformResourcesWithMergeJavaResForDebug'.
> com.android.build.api.transform.TransformException: com.android.builder.packaging.DuplicateFileException: Duplicate files copied in APK META-INF/LICENSE
	File1: I:\cache\ai-w\IteyeBlog\app\libs\httpclient-4.3.5.jar
	File2: I:\cache\ai-w\IteyeBlog\app\libs\httpcore-4.3.2.jar
	File3: I:\cache\ai-w\IteyeBlog\app\libs\httpmime-4.3.5.jar
	File4: I:\cache\ai-w\IteyeBlog\app\libs\jackson-all-1.6.0.jar
解決方法
    packagingOptions {
        exclude 'META-INF/DEPENDENCIES'
        exclude 'META-INF/NOTICE'
        exclude 'META-INF/LICENSE'
        exclude 'META-INF/LICENSE.txt'
        exclude 'META-INF/NOTICE.txt'
    }
as 快捷鍵
Action Mac OSX Win/Linux 注釋代碼(//) Cmd + / Ctrl + / 注釋代碼(/**/) Cmd + Option + / Ctrl + Shift + / 格式化代碼 Cmd + Option + L Ctrl + Alt + L 清除無效包引用 Option + Control + O Alt + Ctrl + O 查找 Cmd + F Ctrl + F 查找+替換 Cmd + R Ctrl + R 上下移動代碼 Option + Shift + Up/Down Alt + Shift + Up/Down 刪除行 Cmd + Delete Ctrl + Y 擴大縮小選中范圍 Option + Up/Down Ctrl + W/Ctrl + Shift + W 快捷生成結構體 Cmd + Option + T Ctrl + Alt + T 快捷覆寫方法 Cmd + O Ctrl + O 快捷定位到行首/尾 Cmd + Left/Right Ctrl + Left/Right 折疊展開代碼塊 Cmd + Plus,Minus Ctrl + Plus/Minus 折疊展開全部代碼塊 Cmd + Shift + Plus,Minus Ctrl + Shift + Plus,Minus 文件方法結構 Cmd + F12 Ctrl + F12 查找調用的位置 Ctrl + Option + H Ctrl + Alt + H 大小寫轉換 Cmd + Shift + U Ctrl + Shift + U
在興趣的驅動下,寫一個免費的東西,有欣喜,也還有汗水,希望你喜歡我的作品,同時也能支持一下。 當然,有錢捧個錢場(支持支付寶和微信捐助,加入it技術扣扣群),沒錢捧個人場,謝謝各位。


謝謝您的贊助,我會做的更好!
 Android事件分發機制完全解析,帶你從源碼的角度徹底理解(上)
其實我一直准備寫一篇關於Android事件分發機制的文章,從我的第一篇博客開始,就零零散散在好多地 方使用到了Android事件分發的知識。也有好多朋友問過我各種問題,比
 Android ApiDemos示例解析(18) App->Activity->Wallpaper
Wallpaper介紹一個Activity如何通過Style把系統Wallpaper作為當前Activity的背景。這是WallpaperActivity在 Androi
 Android瀑布流照片牆實現,體驗不規則排列的美感
傳統界面的布局方式總是行列分明、坐落有序的,這種布局已是司空見慣,在不知不覺中大家都已經對它 產生了審美疲勞。這個時候瀑布流布局的出現,就給人帶來了耳目一新的感覺,這種布
 Android RoboGuice使用指南(7)@ Provides Methods
上例說過如果需要構造一些較復雜的類的實例,通常的方法是使用@Provides 方法。這個方法必須定義在模塊中(Module),而且必須使用@Provides 標注,在 個
 Android ApiDemos示例解析(40):App->Service->Local Service Controller
Local Service Controller 是將LocalServ